


Building Android 15.0.0_1.2.0 BSP Distribution
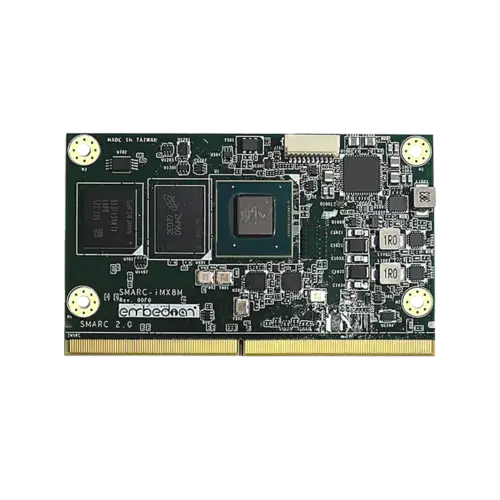
This document provides a step-by-step guide for setting up the Android 15 development environment for the Embedian SMARC-iMX8MQ SMARC modules.
It explains how to download the Android source code, apply required patches, build the Android image, and install the generated firmware onto the target board.
The purpose of this guide is to help developers quickly prepare a working Android 15 system on the SMARC-iMX8MQ platform for evaluation, development, and product integration. Basic familiarity with Linux command-line operations and Android build procedures is recommended before proceeding.This document is based on NXP’s IMX8MQ_15.0.0_1.2.0_ANDROID release.
The host Linux machine is recommended Ubuntu 22.04 64 bit or Debian 11 64bit.
Once you have Ubuntu 22.04 LTS running, install the additional required support packages using the following console command:
$ sudo apt-get install uuid uuid-dev zlib1g-dev liblz-dev liblzo2-2 liblzo2-dev lzop git curl u-boot-tools mtd-utils android-sdk-libsparse-utils device-tree-compiler gdisk m4 bison flex make libssl-dev gcc-multilib libgnutls28-dev swig liblz4-tool libdw-dev dwarves bc cpio tar lz4 rsync ninja-build clang libelf-dev build-essential libncurses5 xxd unzip
Availability
SMARC-iMX8MQ at Embedian.
Carrier Board
EVK-STD-CARRIER-S20 (universal carrier board for all SMARC 1.1 and 2.0 modules) at Embedian.
Basic Resources
- NXP Android OS for iMX Application Processors
- NXP official release: https://www.nxp.com/design/design-center/software/embedded-software/i-mx-software/android-os-for-i-mx-applications-processors:IMXANDROID
Notes
The build machine should have at least 64GB RAM and 450GB of free space to complete the build process.
Obtain Source Code
Get NXP’s Android Release Package
Go to NXP’s website, download 15.0.0_1.2.0_ANDROID_SOURCE (filename: imx-android-15.0.0_1.2.0.tar.gz and put into your ~/downloads directory.
$ mkdir -p ~/android/smarc_8mq/15.0.0_1.2.0
$ cd ~/android/smarc_8mq/15.0.0_1.2.0
$ mkdir ~/bin
$ curl https://storage.googleapis.com/git-repo-downloads/repo > ~/bin/repo
$ chmod a+x ~/bin/repo
$ export PATH=~/bin:$PATH
$ mv ~/download/imx-android-15.0.0_1.2.0.tar.gz .
$ tar xvfz imx-android-15.0.0_1.2.0.tar.gz
$ source imx-android-15.0.0_1.2.0/imx_android_setup.sh
After done, it will create an android_build directory. Go to this directory.
Clone Embedian’s U-Boot (2024.04) and Linux kernel (6.6.58) sources
$ cd ~/android/smarc_8mq/15.0.0_1.2.0/android_build
$ mkdir -p vendor/embedian
$ cd vendor/embedian
$ git clone https://github.com/embedian/smarc-uboot.git uboot-imx -b android-15.0.0_1.2.0-emb_lf_v2024.04
$ git clone https://github.com/embedian/smarc-fsl-linux-kernel.git kernel_imx -b android-15.0.0_1.2.0-emb_lf-6.6.y
Apply Embedian’s patches for i.MX8M Plus platforms
$ cd ~/android/smarc_8mq/15.0.0_1.2.0/android_build/device
$ git clone https://github.com/embedian/android-device.git embedian -b smarc-8mq-android-15.0.0_1.2.0
$ embedian/scripts/install.sh
Build Android Images
Change to Android top level directory.
$ export MY_ANDROID=~/android/smarc_8mq/15.0.0_1.2.0/android_build
$ cd ${MY_ANDROID}
Apply Embedian’s patches and prepare for building environments.
$ cd device
$ embedian/scripts/install.sh
$ cd ${MY_ANDROID}
$ export AARCH64_GCC_CROSS_COMPILE=${MY_ANDROID}/prebuilts/gcc/linux-x86/aarch64/arm-gnu-toolchain-12.3.rel1-x86_64-aarch64-none-linux-gnu/bin/aarch64-none-linux-gnu-
$ export CLANG_PATH=/opt/prebuilt-android-clang
$ export LIBCLANG_PATH=/opt/prebuilt-android-clang/clang-r510928/lib
$ export PATH=/opt/prebuilt-android-kernel-build-tools/linux-x86/bin:$PATH
$ export PATH=/opt/prebuilt-android-rust/linux-x86/1.73.0b/bin:$PATH
$ export PATH=/opt/prebuilt-android-clang-tools/linux-x86/bin:$PATH
Build Android
$ source build/envsetup.sh
$ lunch smarc_8mq-nxp_stable-userdebug
or
$ lunch smarc_8mq-nxp_stable-user
or
$ lunch smarc_8mq-nxp_stable-eng
$ ./imx-make.sh -j4 2>&1 | tee build-1.log
Notes
1. The userdebug build behaves the same as the user build, with the ability to enable additional debugging that normally violates the security model of the platform. This makes the userdebug build with greater diagnosis capabilities for user test.
2. The eng build prioritizes engineering productivity for engineers who work on the platform. The eng build turns off various optimizations used to provide a good user experience. Otherwise, the eng build behaves similar to the user and userdebug builds, so that device developers can see how the code behaves in those environments.
3. The commands below can achieve the same result as ”./imx-make.sh -j4 2>&1 | tee build-1.log”:
$ ./imx-make.sh bootloader kernel -j4 2>&1 | tee build-log.txt
# Build U-Boot/kernel with imx-make.sh first, but not to build Android images.
$ make -j4 2>&1 | tee -a build-log.txt
# Start the process of build Android images with ”make” function.
Images created by the Android build for SMARC-iMX8MQ modules
The images created are located at out/target/product/smarc_8mq/ directory. The images needed to create an Android system on eMMC/SD are listed below.
Image | Description |
U-Boot Image | u-boot.imx / spl.bin, bootloader.img |
GPT table image | partition-table.img |
Android dtbo image | dtbo.img |
Android boot image | boot.img |
Android initialization boot image | init_boot.img |
Android vendor boot image | vendor_boot.img |
Android super image | super.img |
Android verify boot metadata image | vbmeta.img |
Images created by the Android build for SMARC-iMX8MQ modules
The layout of the eMMC card for Android system is shown below:
[Partition type/index] which is defined in the GPT.
[Start Offset] shows where partition is started, unit in MB.
The userdata partition is used to put the unpacked codes/data of the applications, system configuration database, and so on. In normal boot mode, the root file system is first mounted with RAMDisk from boot partition, and then the logical system partition is mounted and switched as root. In recovery mode, the root file system is mounted with RAMDisk from the boot partition.
Partition Type/ Index | Name | Start Offset | Size | File system | Content | |||
N/A | bootloader0 | 32KB | 4 MB | N/A | spl.imx/u-boot.imx | |||
(1) | bootloader_a | 8MB | 16 MB | N/A | bootloader.img | |||
(2) | bootloader_b | Following bootloader_a | 16 MB | N/A | bootloader.img | |||
1 (3) | dtbo_a | 8 MB (following bootloader_b) | 4 MB | N/A | dtbo.img | |||
2 (4) | dtbo_b | Follow dtbo_a | 4 MB | N/A | dtbo.img | |||
3 (5) | boot_a | Follow dtbo_b | 64 MB | boot.img format, a kernel + part of RAMDisk | boot.img | |||
4 (6) | boot_b | Follow boot_a | 64 MB | boot.img format, a kernel + part of RAMDisk | boot.img | |||
5 (7) | init_boot_a | Follow boot_b | 8 MB | part of RAMdisk | init_boot.img | |||
6 (8) | init_boot_b | Follow init_boot_a | 8 MB | part of RAMdisk | init_boot.img | |||
7 (9) | vendor_boot_a | Follow init_boot_b | 64 MB | part of RAMdisk | vendor_boot.img | |||
8 (10) | vendor_boot_b | Follow vendor_bvoot_a | 64 MB | part of RAMdisk | vendor_boot.img | |||
9 (11) | misc | Follow vendor_boot_b | 4 MB | N/A | For recovery storage bootloader message, reserve. | |||
10 (12) | metadata | Follow misc | 64 MB | f2fs | Metadata of OTA update, remount, and so on. | |||
11 (13) | presistdata | Follow metadata | 1 MB | N/A | the option to operate unlock unlock | |||
12 (14) | super | Follow presistdata | 4096 MB | N/A | system.img, system_dlkm. img, system_ext.img, vendor.img, vendor_dlkm. img, and product.img | |||
13 (15) | userdata | Follow super | Remained space | f2fs | Application data storage for system application. And for emulated storage, in /data/ media/<user_id> dir. | |||
14 (16) | fbmisc | Follow userdata | 1 MB | N/A | To store the state of lock/ unlock. | |||
15 (17) | vbmeta_a | Follow fbmisc | 1 MB | N/A | To store the verify boot’s metadata. | |||
16 (18) | vbmeta_b | Follow vbmeta_a | 1 MB | N/A | To store the verify boot’s metadata. | |||
UUU Scripts
The table below describes the UUU scripts included in Android 15.0.0_1.2.0. These scripts are used together with the UUU binary tool to flash Android images onto the SD card or eMMC of the SMARC-iMX8MQ boards. The scripts are generated in the out/target/product/smarc_8mq/ directory after the build process completes.
UUU Script Name | Function |
uuu_android_flash.bat | Script to generate lst file on Windows OS |
uuu_android_flash.sh | Script to generate lst file on Linux OS |
Setup SD Card
Prepare for an SD card and insert into your Linux host PC.
$ cd out/target/product/smarc_8mq/
$ chmod a+x imx-sdcrad-partition.sh
$ sudo ./imx-sdcrad-partition.sh -f imx8mq -d <dtb_feature> -u <uboot_feature> /dev/sdX; sync
<dtb_feature> | Description |
<blank> | Support no display configuration |
<hdmi> | Support HDMI display configuration |
<dcss-lvds> | Support LVDS display configuration (DCSS controller) |
<lcdif-lvds> | Support LVDS display configuration (LCDIF controller) |
<dp> | Support DisplayPort display configuration |
<uboot_feature> | Description |
<blank> | Standard/non-featured bootloader |
<dual> | Dual-slot A/B boot support |
<trusty-dual> | Dual-slot boot + Trusty TEE |
<trusty-rbidx-blob-dual> | Trusty + rollback index protection + bootloader blobs + dual-slot |
<trusty-secure-unlock-dual> | Trusty + secure unlock support + dual-slot |
Notes
1. The minimum size of the SD card is 8 GB.
2. /dev/sdX, the X is the disk index from ’a’ to ’z’. That may be different on each computer running Linux OS.
3. If the SD card is 16 GB, use ”sudo ./imx-sdcrad-partition.sh -f imx8mq -d <dtb_feature> -u <uboot_feature> /dev/sdX” to flash images.
4. If the SD card is 8 GB, use ”sudo ./imx-sdcrad-partition.sh -f imx8mq -d <dtb_feature> -u <uboot_feature> -c 7 /dev/sdX” to flash images.
5. If the SD card is 32 GB, use ”sudo ./imx-sdcrad-partition.sh -f imx8mq -d <dtb_feature> -u <uboot_feature> -c 28 /dev/sdX” to flash images.
Insert the SD card into your device, set the BOOT_SEL to “ON OFF OFF” and shut cross the TEST# pin to Ground. You will be able to see Android booting up. The next section will instruct you to flash eMMC.
Setup eMMC
Setup eMMC for Android is a bit complex, but trivial. There are a couple of ways to achieve it.
Use UUU
UUU can be used to download all images into a target device. It is a quick and easy tool for downloading images. See the AndroidTM Quick Start Guide (AQSUG) for detailed description of UUU.
Before using this tool, make sure that FORCE_RECOV# pin has to be shunt to Ground (Serial Download Mode) so the CPU enters Serial Download Mode. Then connect the USB0 Mini-B port of the device to the host computer.
Copy the out/target/product/smarc_8mq into your host PC.
$ .\uuu_android_flash.bat -f imx8mq -d <dtb_feature> -u <uboot_feature> -e
<dtb_feature> | Description |
<blank> | Support no display configuration |
<hdmi> | Support HDMI display configuration |
<dcss-lvds> | Support LVDS display configuration (DCSS controller) |
<lcdif-lvds> | Support LVDS display configuration (LCDIF controller) |
<dp> | Support DisplayPort display configuration |
<uboot_feature> | Description |
<blank> | Standard/non-featured bootloader |
<dual> | Dual-slot A/B boot support |
<trusty-dual> | Dual-slot boot + Trusty TEE |
<trusty-rbidx-blob-dual> | Trusty + rollback index protection + bootloader blobs + dual-slot |
<trusty-secure-unlock-dual> | Trusty + secure unlock support + dual-slot |
After the process is complete, set BOOT_SEL to OFF ON ON to boot the SMARC-iMX8MQ from the eMMC.
Use a Ubuntu 22.04 or Debian 12 Bootable SD card
The second recommended method is to create a bootable Ubuntu 22.04 or Debian 12 SD card for the SMARC-iMX8MQ modules. Users can visit our Linux Development Site to learn how to create a bootable Ubuntu 22.04 or Debian 12 SD card. Pre-built images are also available for download from our FTP site.
After downloading the images, follow the ”Setup SD Card” section on our Linux Development Site. Once completed, copy the out/target/product/smarc_8mq folder to your home directory.
Then follow the same procedure used to create an Android SD card, except that the eMMC device will now appear as /dev/mmcblk0.
Insert the bootable SD card into SMARC-iMX8MQ and set the BOOT_SEL to ON OFF OFF. Power up the device and run:
$ sudo apt-get update
$ sudo apt-get install android-sdk-libsparse-utils
$ sudo ./imx-emmc-partition.sh -f imx8mq -d <dtb_feature> -u <uboot_feature> /dev/mmcblk0; sync
<dtb_feature> | Description |
<blank> | Support no display configuration |
<hdmi> | Support HDMI display configuration |
<dcss-lvds> | Support LVDS display configuration (DCSS controller) |
<lcdif-lvds> | Support LVDS display configuration (LCDIF controller) |
<dp> | Support DisplayPort display configuration |
<uboot_feature> | Description |
<blank> | Standard/non-featured bootloader |
<dual> | Dual-slot A/B boot support |
<trusty-dual> | Dual-slot boot + Trusty TEE |
<trusty-rbidx-blob-dual> | Trusty + rollback index protection + bootloader blobs + dual-slot |
<trusty-secure-unlock-dual> | Trusty + secure unlock support + dual-slot |
Power off and set BOOT_SEL to ”OFF ON ON”, leave the TEST# pin floating and you will be able to boot up your Android from on-module eMMC.
UPDATE ANDROID FIRMWARE
Generate OTA Packages
For generating ”OTA” packages, use the following commands:
$ cd ${MY_ANDROID}
$ lunch smarc_8mq-nxp_stable-userdebug
or
$ lunch smarc_8mq-nxp_stable-user
or
$ lunch smarc_8mq-nxp_stable-eng
./imx-make.sh bootloader kernel -j4
$ make otapackage -j4 2>&1
Install OTA Packages to device
- Extract payload.bin and payload_properties.txt from OTA zip file
- Push file payload.bin to somewhere on the device (typically /cache folder)
- Open payload_properties.txt on an editor to copy its content, lets suppose it’s like in the NXP manual:
Input the following command on the board’s console to update:
Make sure that the — header equals to the exact content of payload_properties.txt without ”space” or ”return” charactAfter issuing the command, nothing seems to happen on the device, but you can monit logcat for operation progress. After a successful update you can reboot into the updated version.
You can check chapter 7 of official NXP ”Android User Guide” for further ”Over-The-Air (OTA) Update” examples.
Manual Operations
Manually Build boot.img
When you perform changes to the kernel, you may build boot.img solely instead of building the whole Android.
$ cd ${MY_ANDROID}
$ source build/envsetup.sh
$ lunch smarc_8mq-nxp_stable-userdebug
or
$ lunch smarc_8mq-nxp_stable-user
or
$ lunch smarc_8mq-nxp_stable-eng
$ make bootimage
Manually build Bootloader
$ cd ${MY_ANDROID}
$ source build/envsetup.sh
$ lunch smarc_8mq-nxp_stable-userdebug
or
$ lunch smarc_8mq-nxp_stable-user
or
$ lunch smarc_8mq-nxp_stable-eng
$ ./imx-make.sh bootloader -j4
It will generate bootloader.img, bootloader-imx8mq-dual.img, bootloader-imx8mq-trusty-dual.img, bootloader-imx8mq-trusty-rbidx-blob-dual.img, bootloader-imx8mq-trusty-secure-unlock-dual.img
Manual build Android Linux Kernel and modules
$ cd ${MY_ANDROID}
$ source build/envsetup.sh
$ lunch smarc_8mq-nxp_stable-userdebug
or
$ lunch smarc_8mq-nxp_stable-user
or
$ lunch smarc_8mq-nxp_stable-eng
$ ./imx-make.sh kernel -j4
The kernel images are found in ${MY_ANDROID}/out/target/product/smarc_8mq/obj/KERNEL_OBJ/arch/arm64/boot/Image
version 1.0a, 5/25/2026
Last updated 2026-5-25